1. VAT invoicing information registration
1.1 Add VAT-related information
1.1.1 VAT-registered business
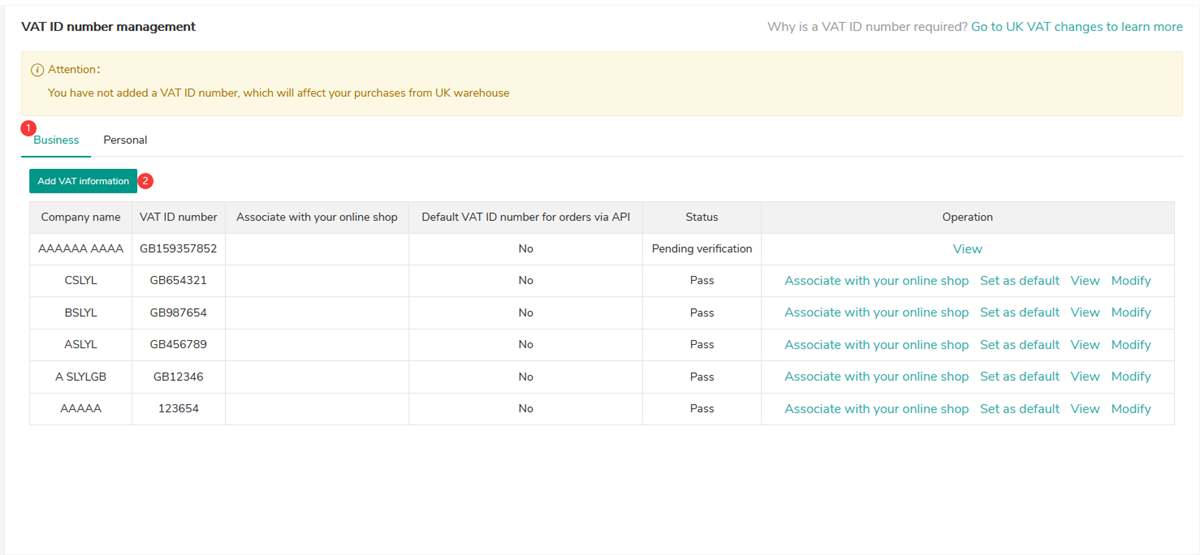
Step 1: Go to "My SaleYee" - "Account" - "VAT related info";
Step 2: Click "Business";
Step 3: Click“Add VAT information" to fill in related information;
* To improve the approval efficiency, please read the guidelines carefully and strictly follow them when filling in related information.
Step 4: Tick“I have read and agreed to《Commitment Confirmation Letter》";
Step 5: Click "Save" to submit the information and please wait for the approval.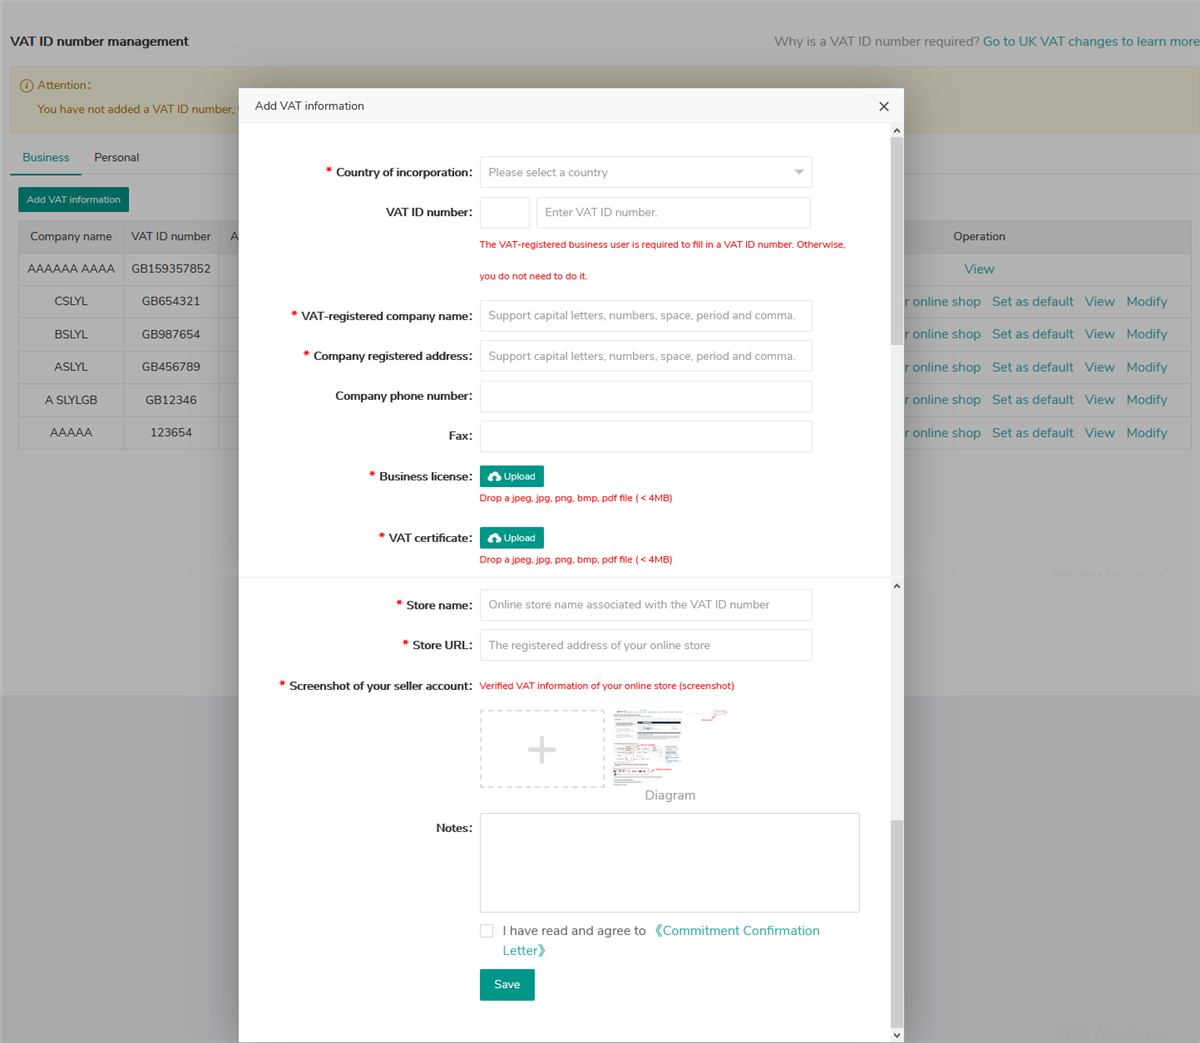
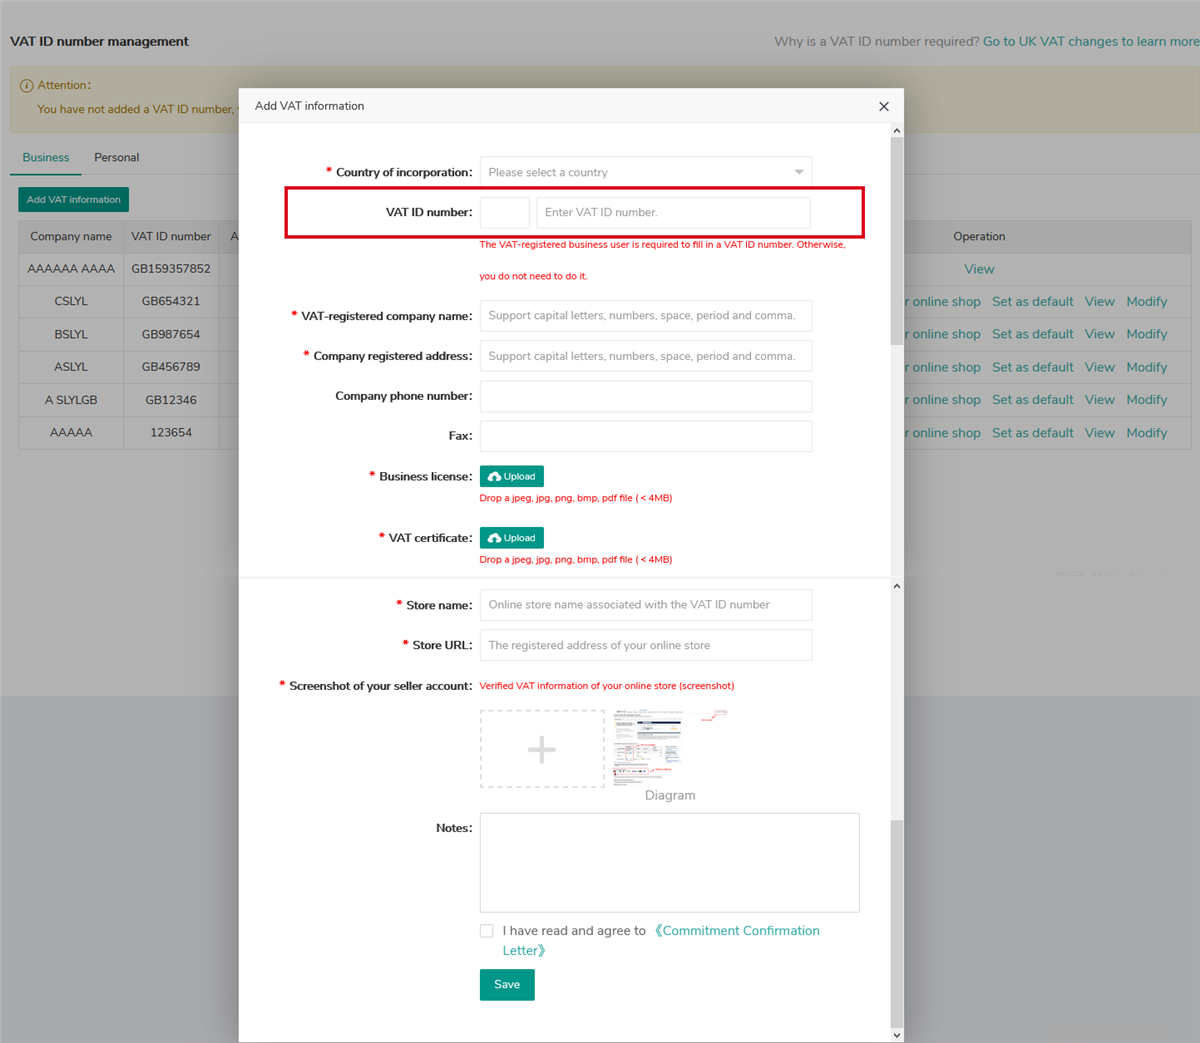
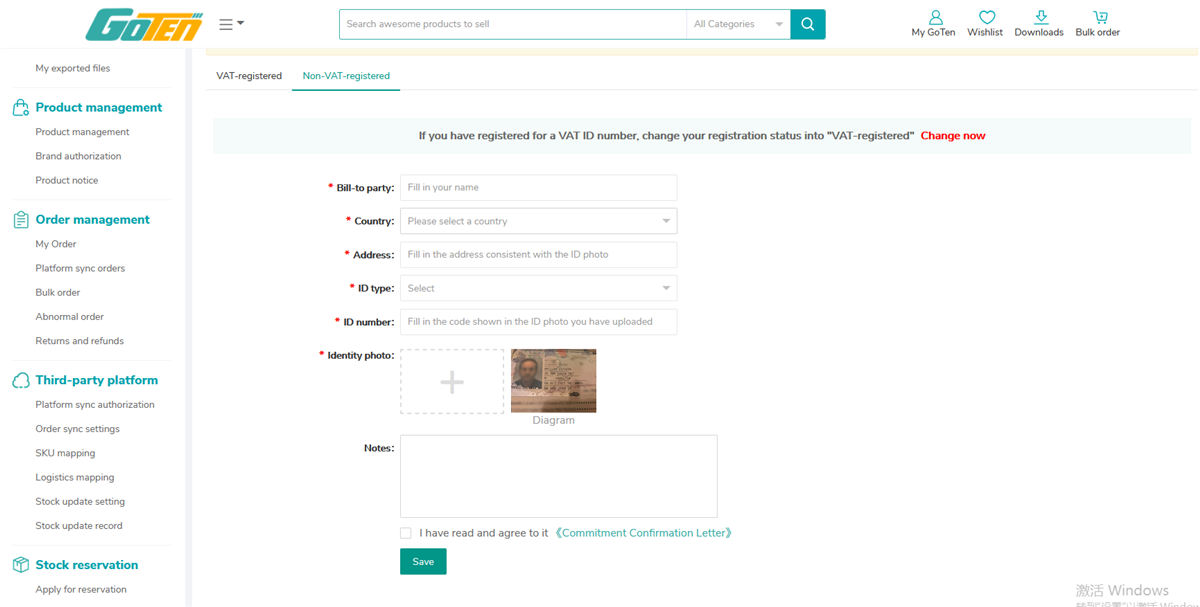
1.1.2 Non-VAT-registered business
Basic steps are the same as "1.1.1 VAT-registered business" above, but VAT ID number is not required.
1.1.3 Non-VAT-registered personal
Step 1: Go to "My SaleYee" - "Account" - "VAT related info";
Step 2: Click "Personal";
Step 3: Fill in related information;
* To improve the approval efficiency, please read the guidelines carefully and strictly follow them.
Step 4: Tick“I have read and agreed to《Commitment Confirmation Letter》";
Step 5: Click "Save" to submit the information and please wait for the approval.
Note:
A. If you have added information as a "VAT-registered business" or "Non-VAT-registered business", you cannot continue to add information as a "Non-VAT-registered personal".
B. If you have first added information as a "Non-VAT-registered personal", you can continue to add information as a "VAT-registered business" or "Non-VAT-registered business"; the information as a "Non-VAT-registered personal" will become invalid.
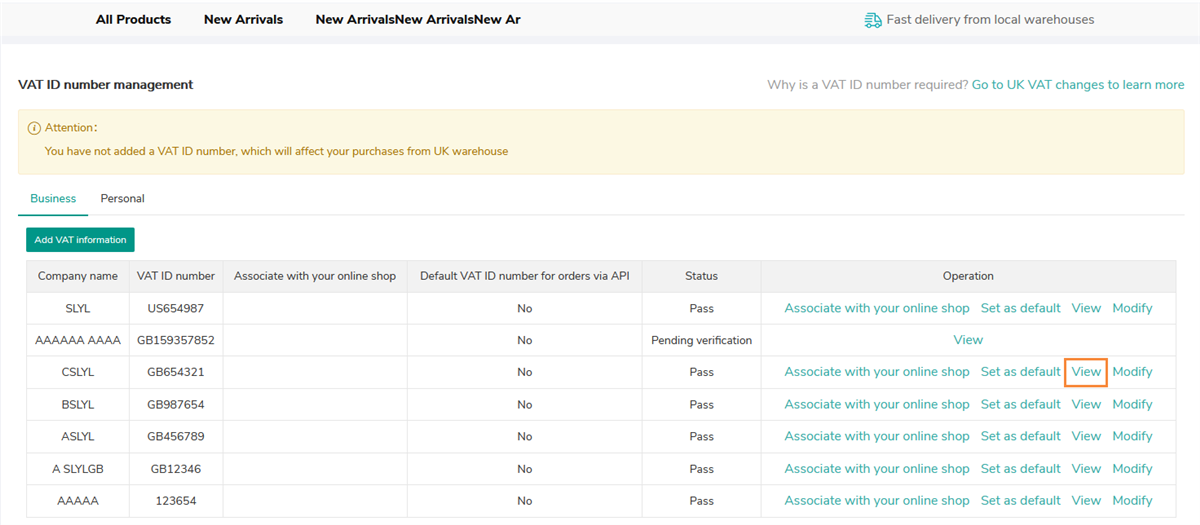
1.2 View VAT registration information
Click "View" to review the VAT registration information and check the verification status.
1.3 VAT-related information modification
The VAT-related information that fails to be approved or has been approved can be modified. The information modified needs to be submitted for approval again.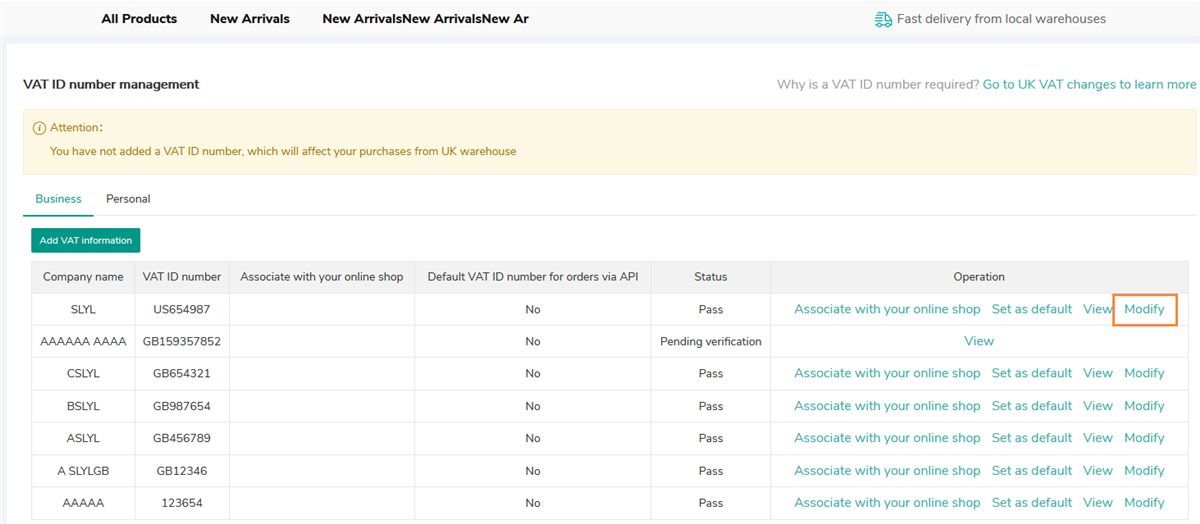
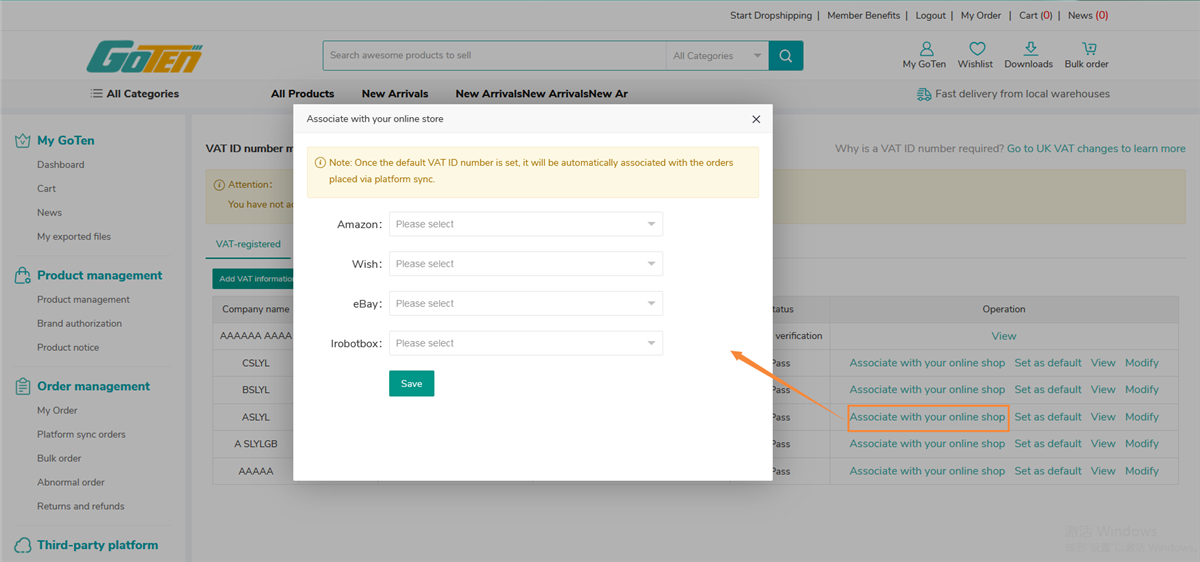
1.4 Platform sync orders: VAT ID number setting
Once the default VAT ID number is set, it will be automatically associated with the orders placed via platform sync.
Step 1: Click "Associate with your online shop", then select the online shop that you want to associate with on the corresponding selling platform;
Step 2: Click "Save" and the setting is completed.
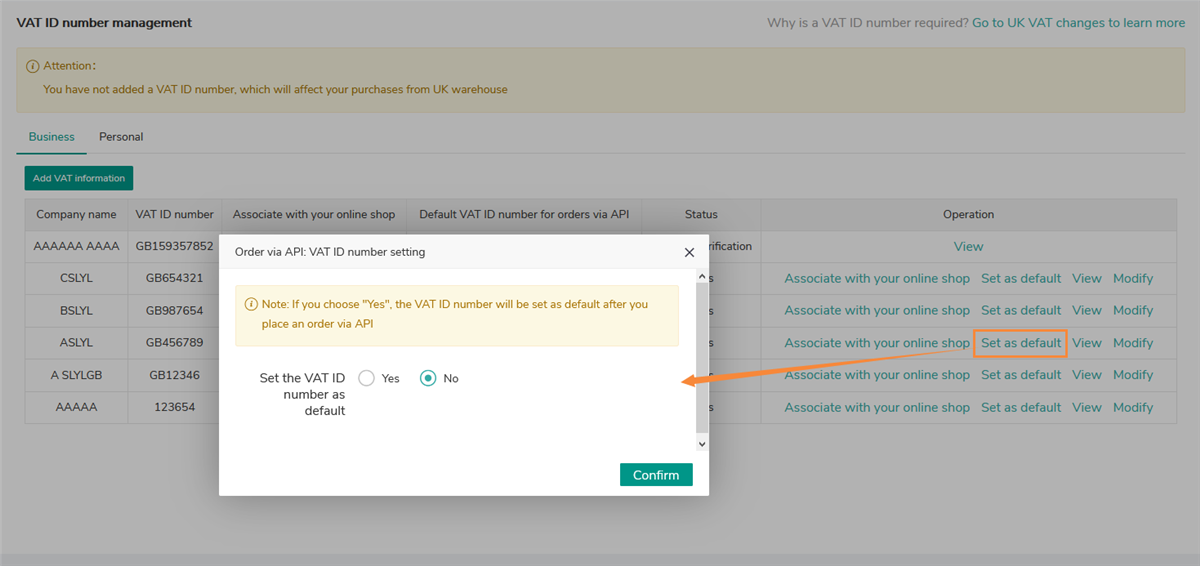
1.5 Order via API: VAT ID number setting
Once the default VAT ID number is set, it will be automatically associated with the orders placed via API.
Step 1: Click "Set as default";
Step 2: Choose "Yes" and the VAT ID number will be set as default after you place an order via API;
Step 3: Click "Confirm" and the setting is completed.
1.6 Invoice download
Invoices for the orders in the status of “awaiting shipment” or “orders to be received” can be downloaded.
Step 1: Click "Download" and the invoice for a single order can be downloaded;
Step 2: Click "Download invoices in bulk" and invoices for multiple orders can be downloaded.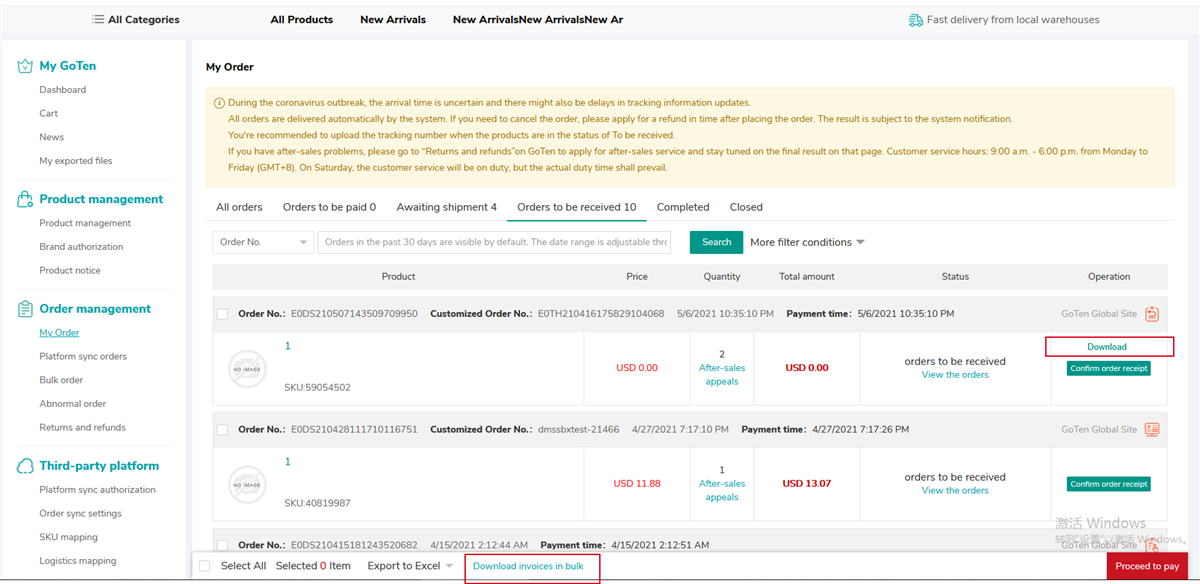
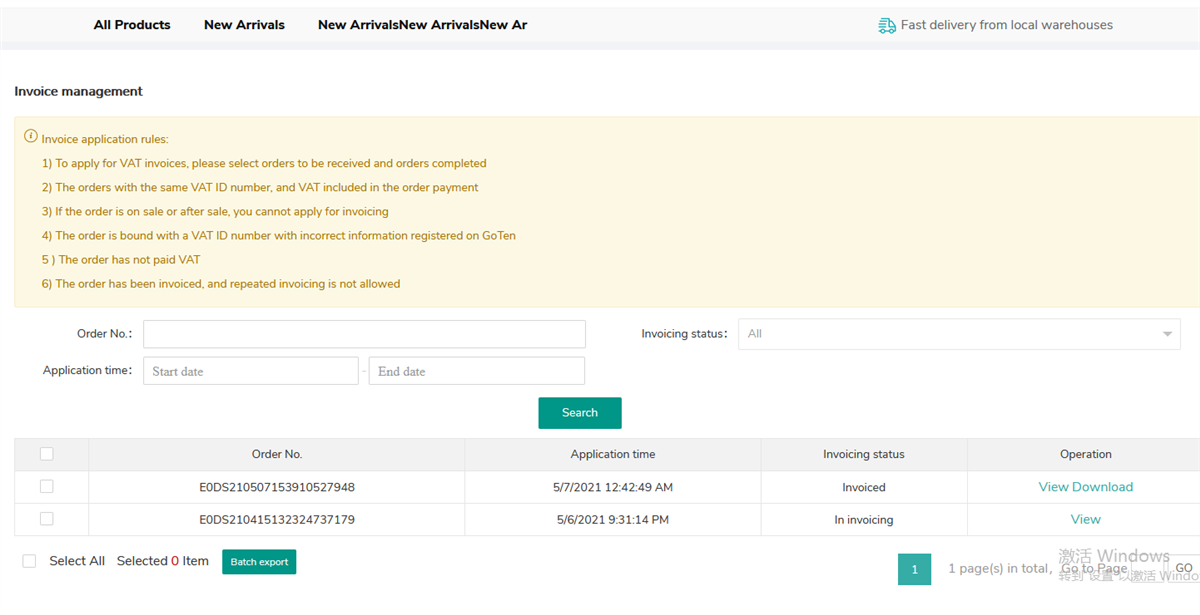
1.7 Invoice management
Invoice records for historical orders can be viewed and downloaded in the invoice management module.
