This is an article for you to learn how to set up a Facebook Ad account, install the Facebook Pixel on your Shopify store to keep track of different events step by step.
First of all, you need to to have a Shopify store up and running and a Facebook account.
You may choose to follow the video below to complete the setup.
Step 1: Create a Facebook Business Manager account
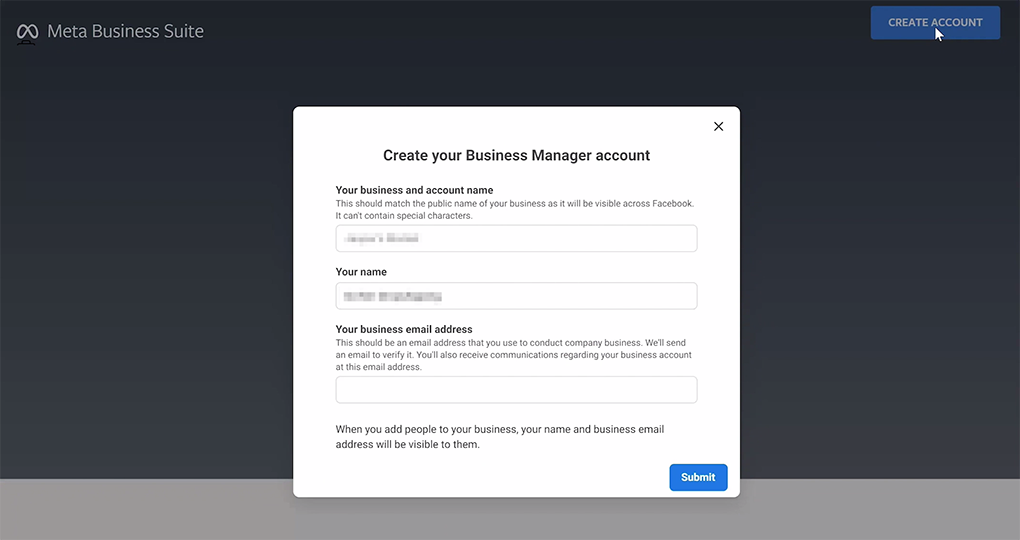
Visit business.facebook.com, log in to your Facebook account first, and click "Create Account." Enter your business name, account name, business email, and click "Submit."
Then, you need to go through the email verification.
Step 2: Set up a Facebook Ad Account
Go to "Business Settings," choose "Ad Accounts," click "Add" and choose "Create a New Ad Account" in the drop-down menu.
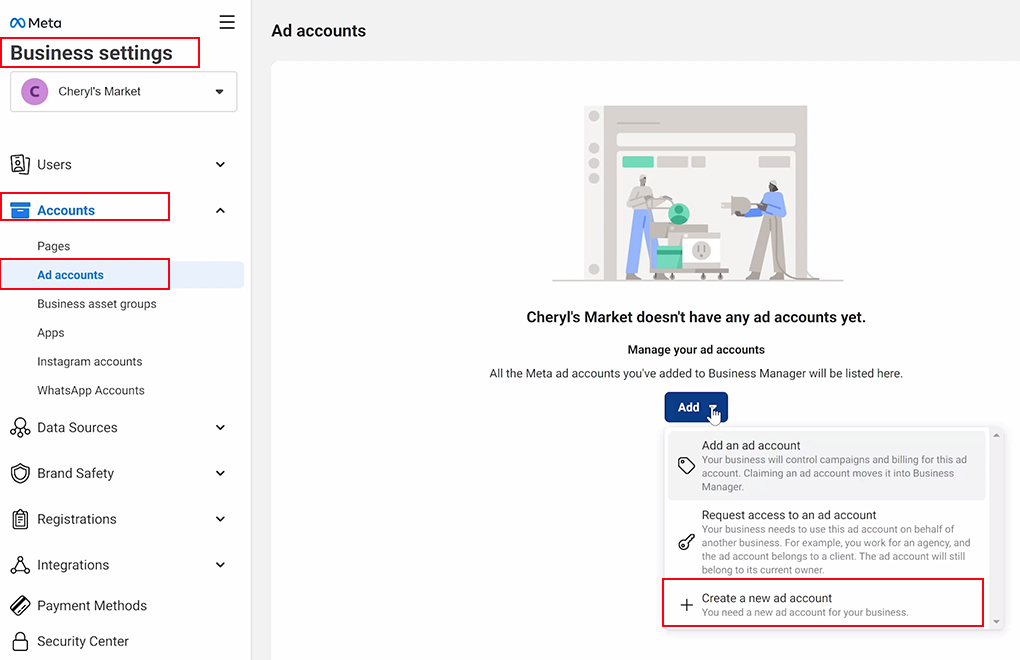
Enter the Ad account name, Time zone, and Currency. Then, click "Next."
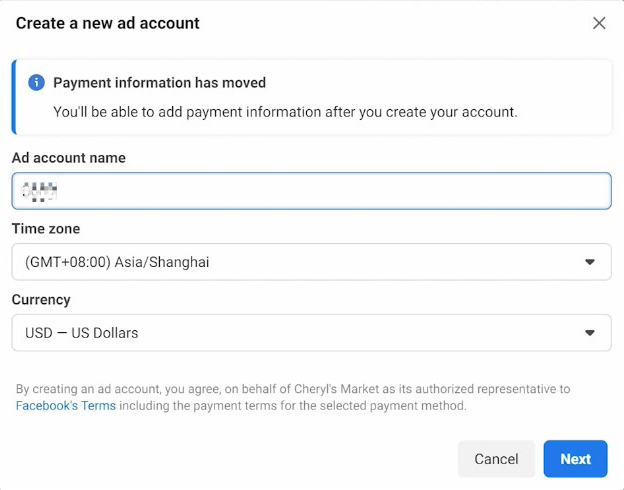
Choose "My business" when being asked who will this ad account be used for, and click "Create."
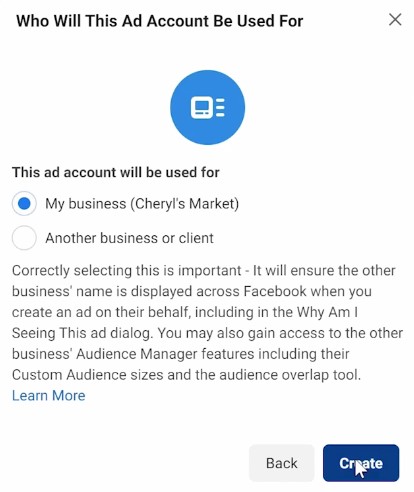
Next, add people, set permissions, and click "Assign."
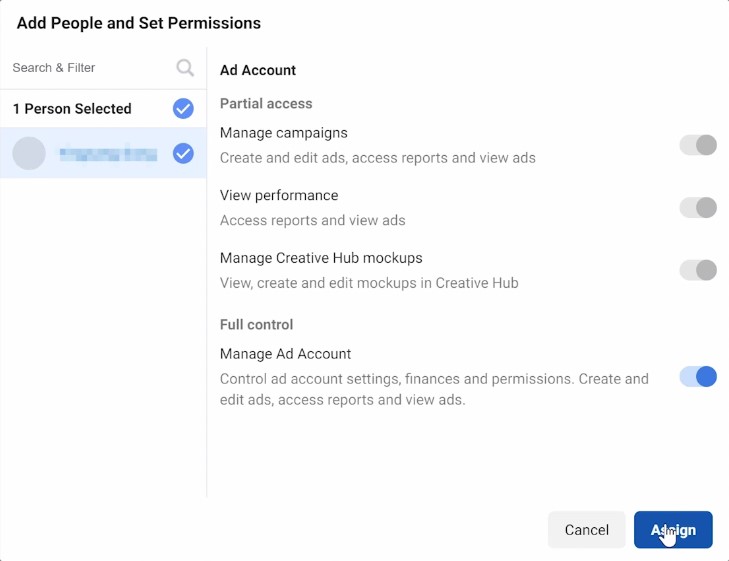
Finally, you need to "Add Payment Info." You may also do it later.
Step 3: Set up the Facebook Pixel
You need to generate a Facebook Pixel and properly install it to keep track of customers' interaction with your Shopify store. Here's how to set up a Facebook Pixel.
Go to "Events Manager", click "Connect Data Sources" and select "Web." 
Create a pixel, enter your store URL, and click "Next" to continue.
Choose "Pixel only" and click "Next." 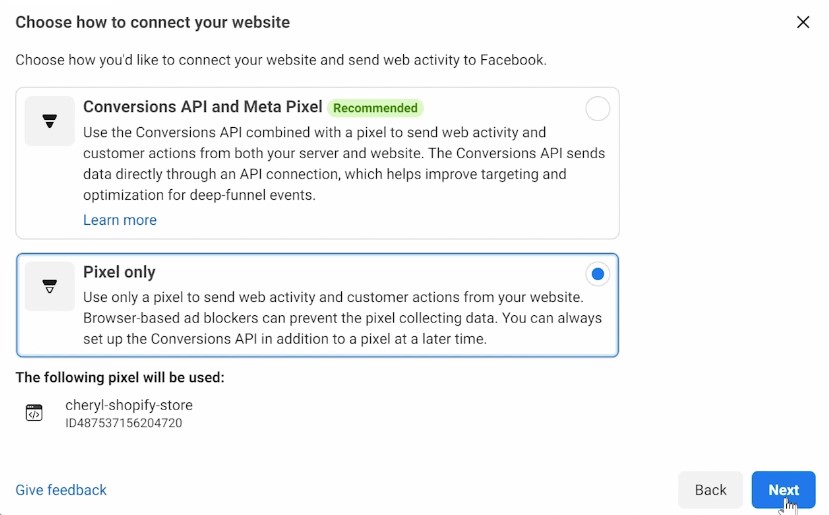
Then, choose "User a partner," select Shopify to move on.
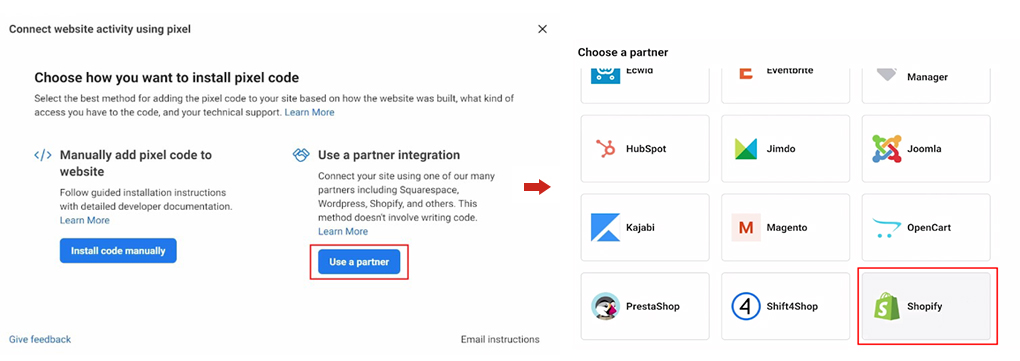
Step 4: Add Facebook Pixel to Your Shopify Store
Copy the Facebook Pixel ID, head over to your Shopify Admin, choose "Online Store" - "Preferences," paste the Facebook Pixel in the blank, and "Save" the settings.
![]()
Step 5: Set up Facebook Marketing for Your Store
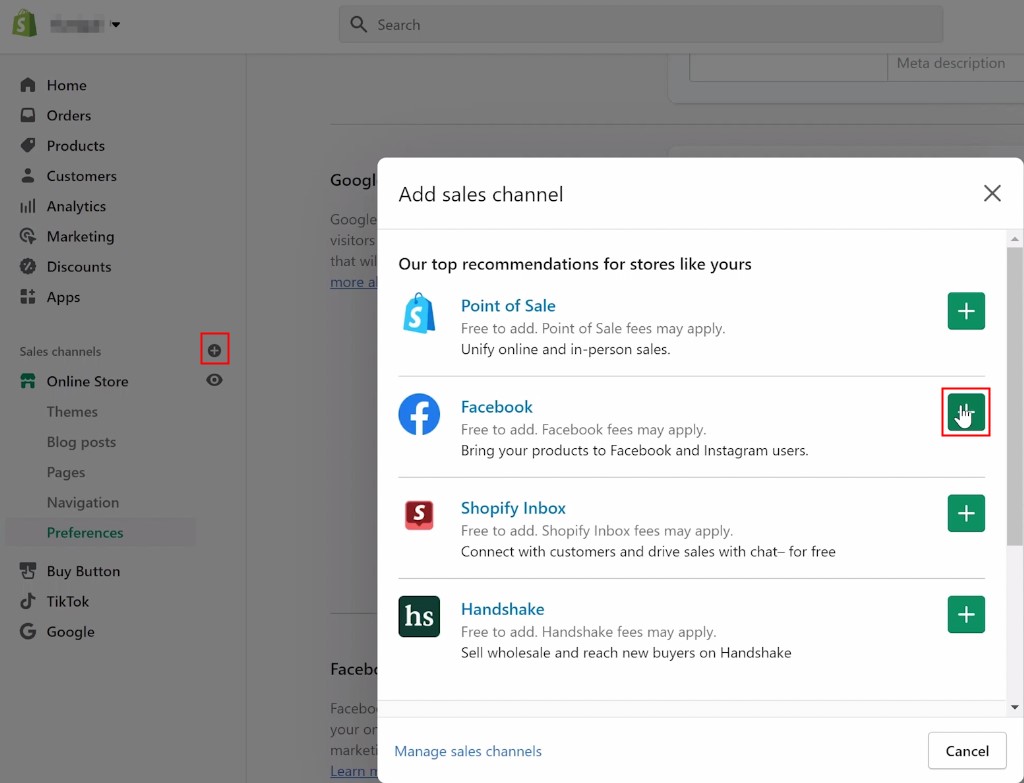
Click the "+" button next to "Sales channels," choose Facebook in the pop-up window by clicking the green "+" button. On the new page, click "Update sales channel."
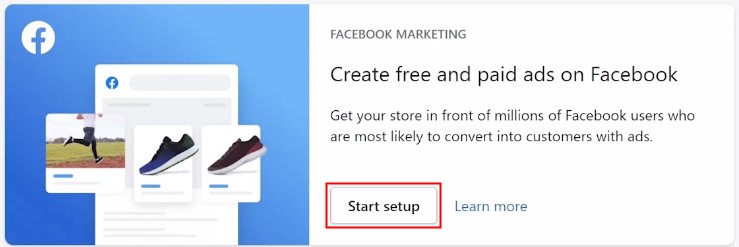
Now, you need to "Start Setup" of Facebook Marketing.
Connect your Facebook account, enter your password to continue, confirm to continue, and click "Continue" again.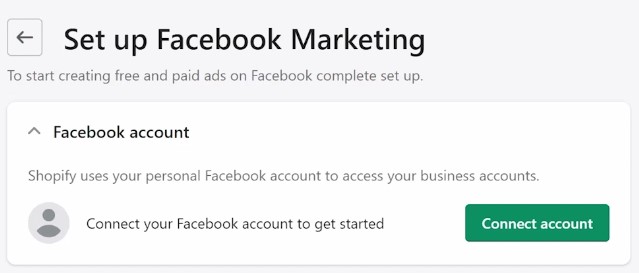
Then, "Connect" the Business Manager.
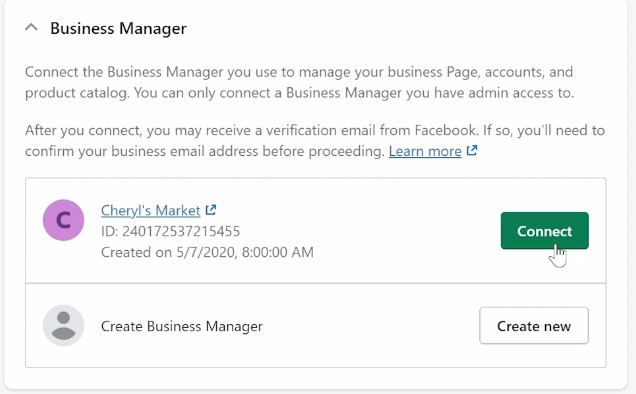
Connect an Ad account associated with your Shopify store, click "Connect."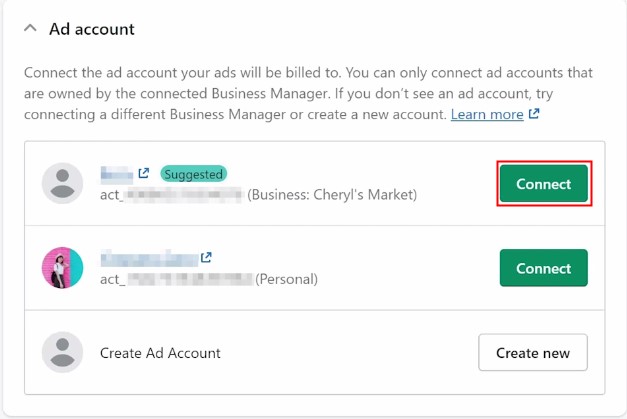
"View and Accept terms," "Accept" after you read through the terms, and "Done" to complete the process.
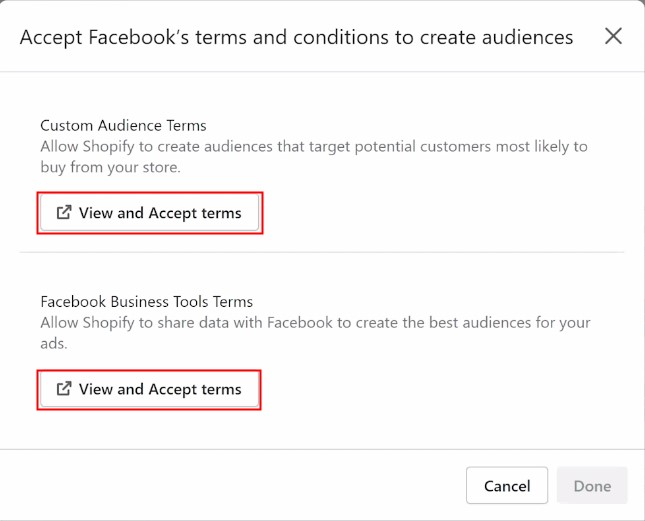
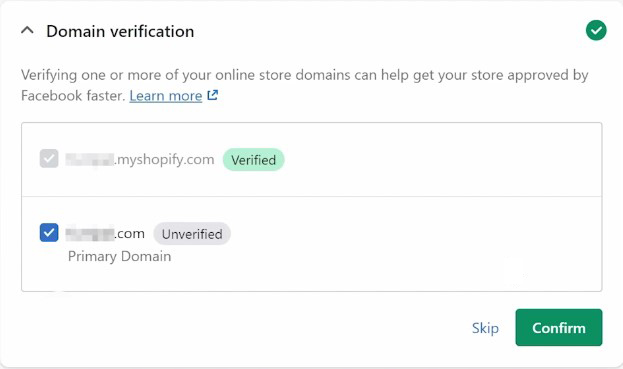
Next, verify your primary domain, tick the box, and click "Confirm."
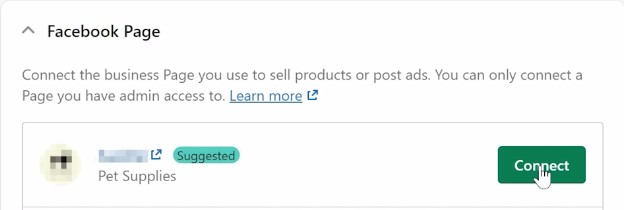
Then, "Connect" to the Facebook Page associated with your store.
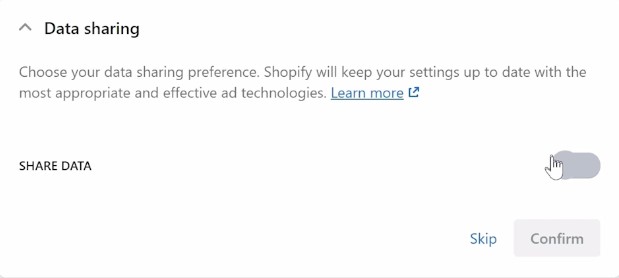
Make sure to enable data sharing.
Define your target country, and read "Terms and conditions."


So far so good! Don't forget to update payment details.
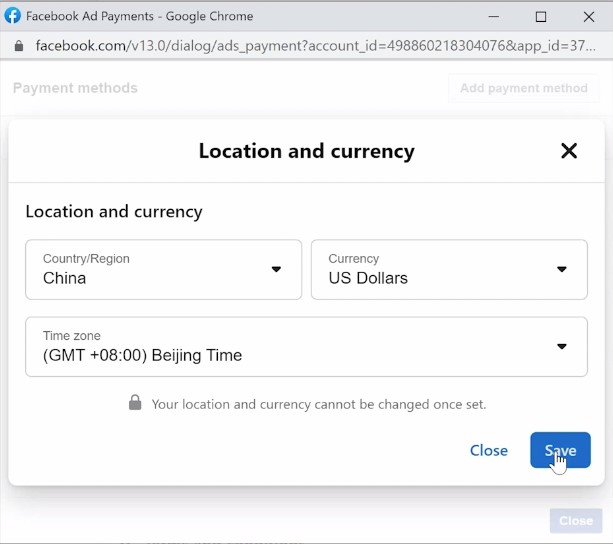
Here's what you should do. Check the location, currency, time zone, and click "Save."
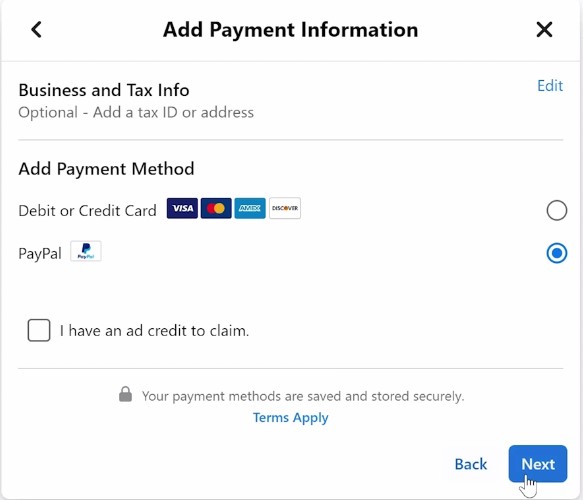
Then, you'll be asked to add payment information. You can use PayPal - just choose a way to pay, click "Continue" and the payment method will be added successfully.
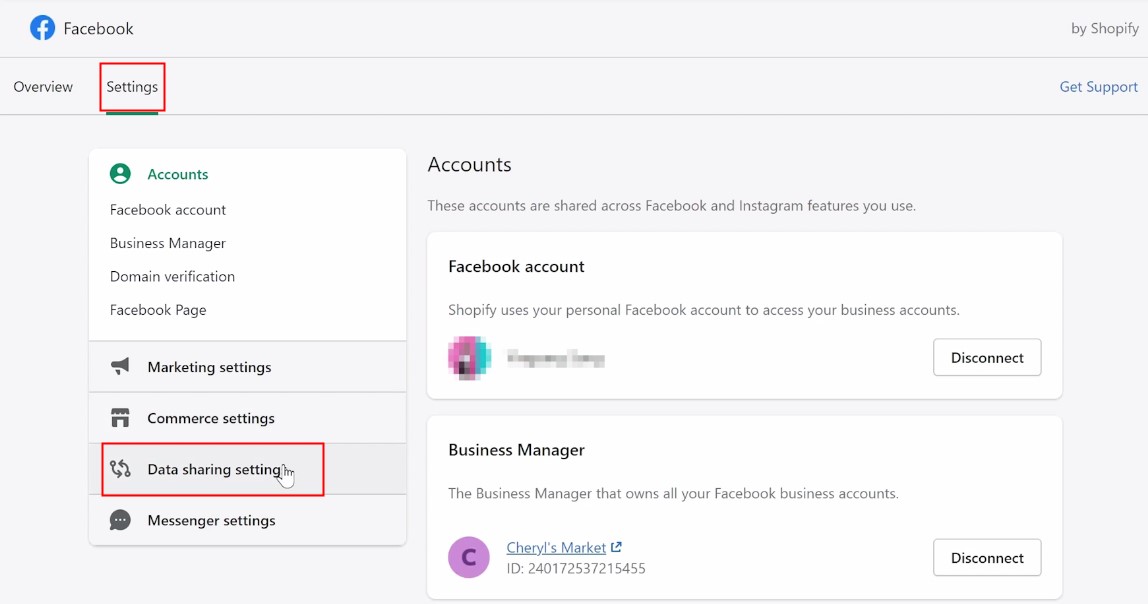
Once you've finished the setup, go to "Settings," choose "Data sharing settings."
Then, you will see three different options, namely, "Standard," "Enhanced" and "Maximum."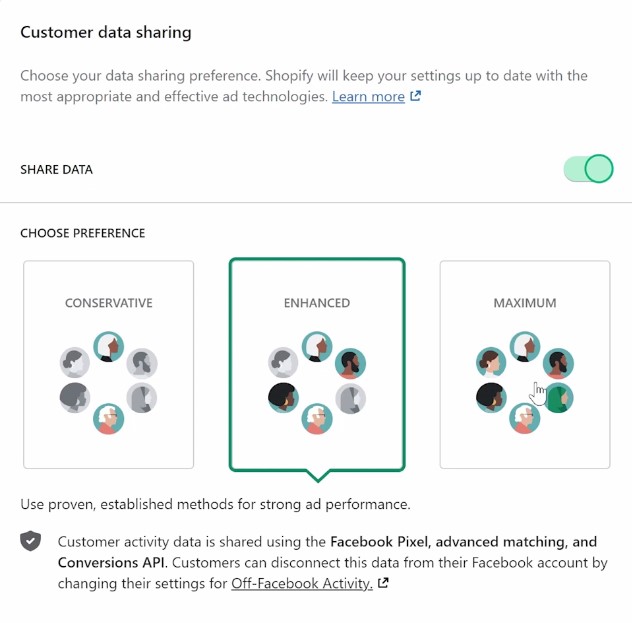
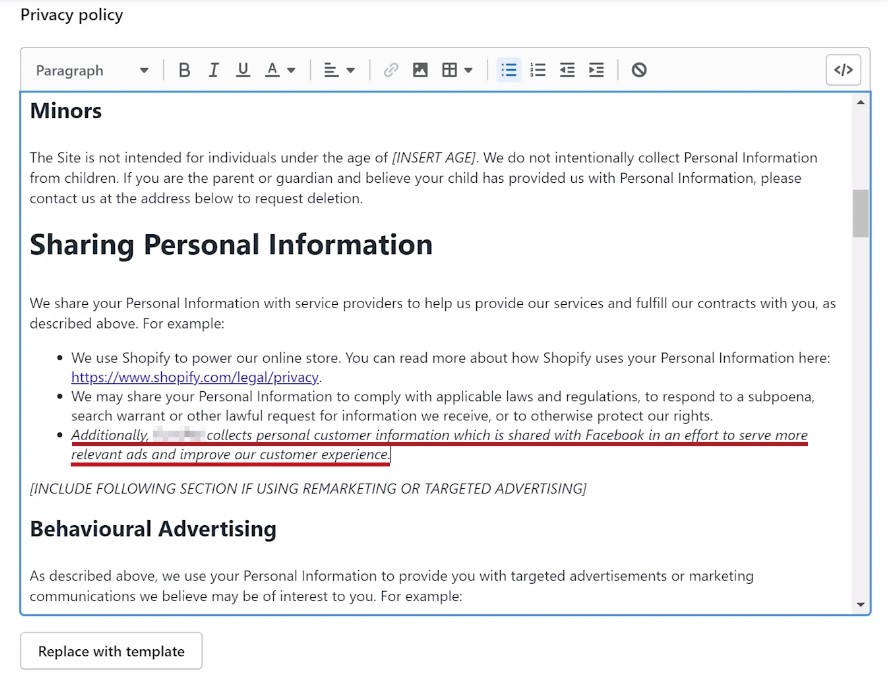
No matter which one you choose, make sure to update your privacy policy by specifying that customers' personal data will be shared with Facebook to run relevant ads. Then, click "Save" on the top right.
Finally, go back to confirm the change.
Step 6: Set up "Events" to Track Conversions
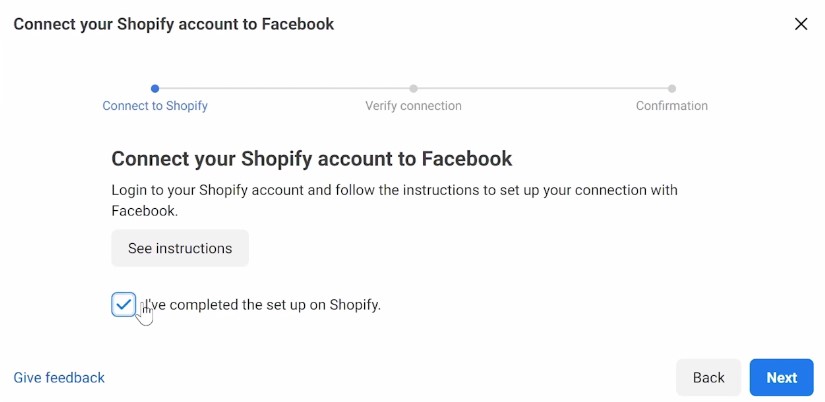
Go back to Facebook to confirm that you've completed the setup on Shopify, and click "Next."
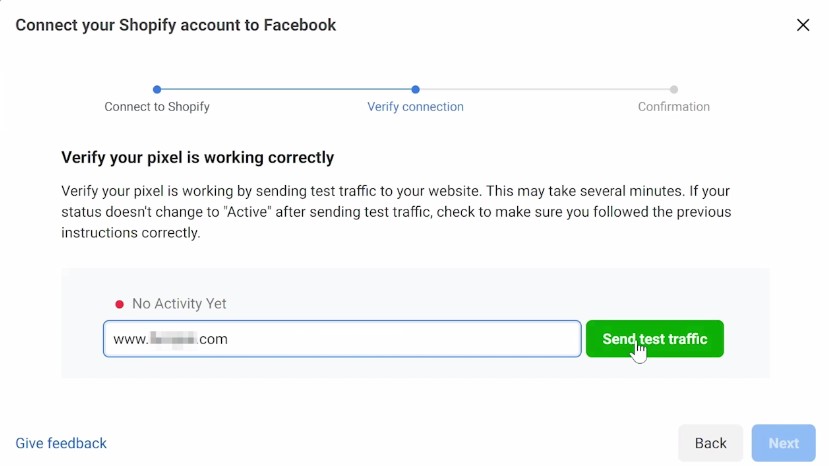
Now, enter your Shopify store URL to send test traffic and verify the connection.
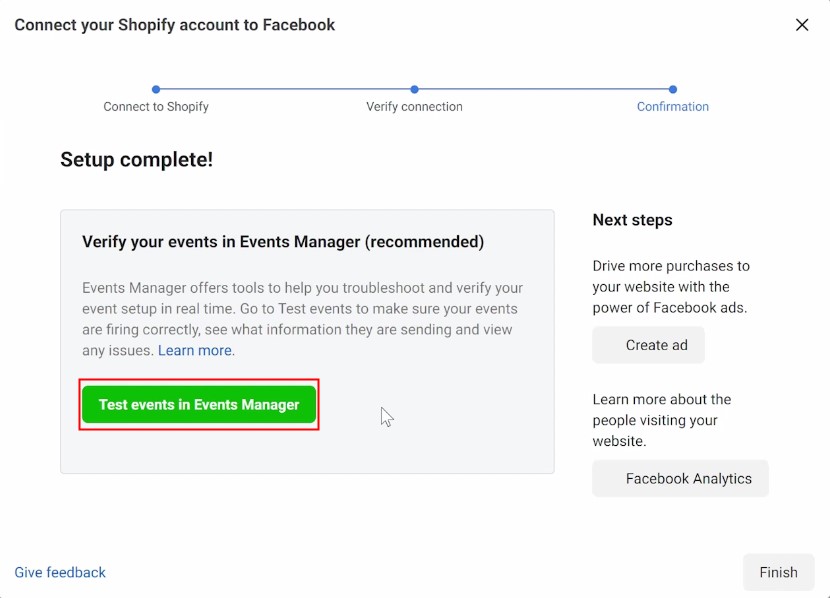
The final step is confirmation, you can take advantage of "Test events in Events Manager."
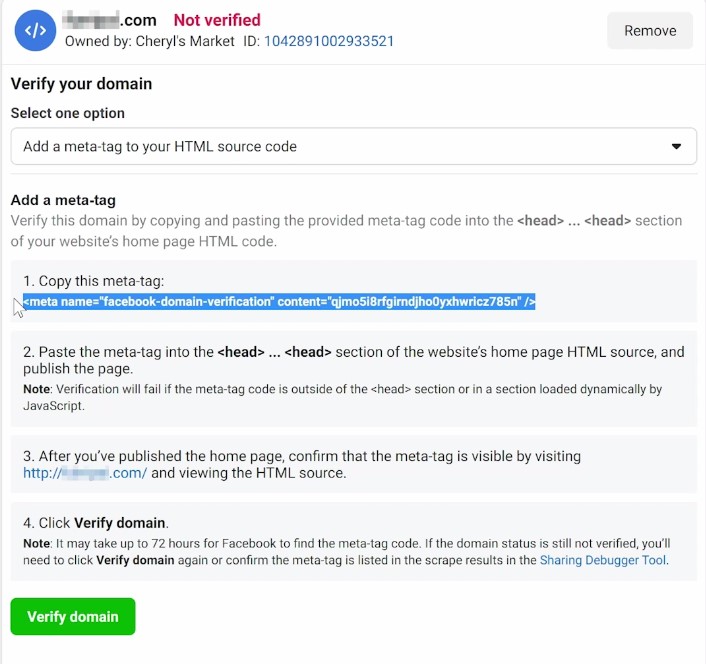
Click "View Events" and you'll find that you still need to verify the domain.

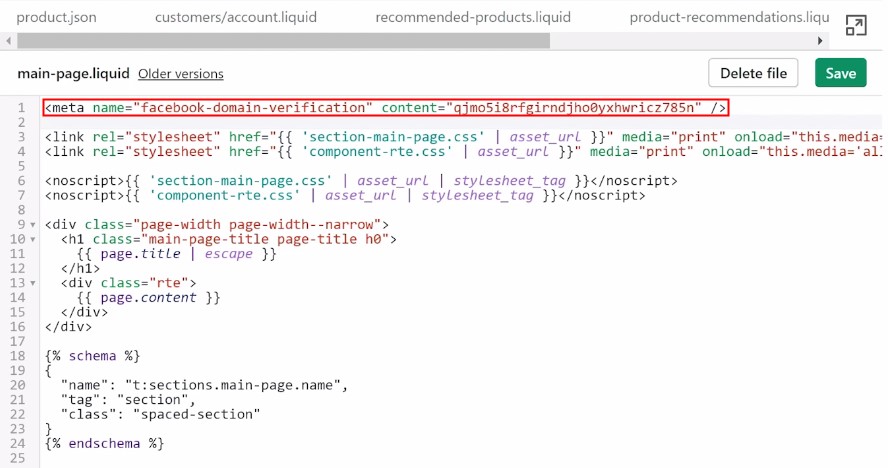
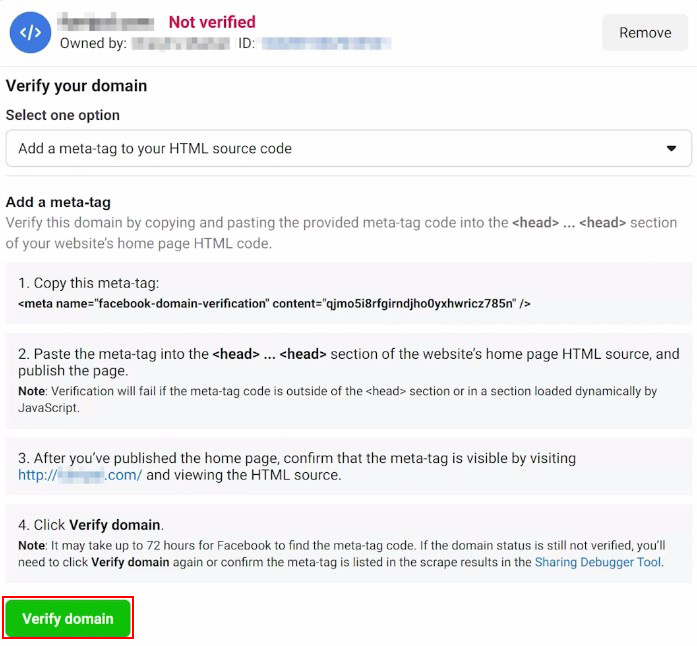
Facebook asks you to copy the meta tag and paste it into the code of the homepage of your Shopify store.
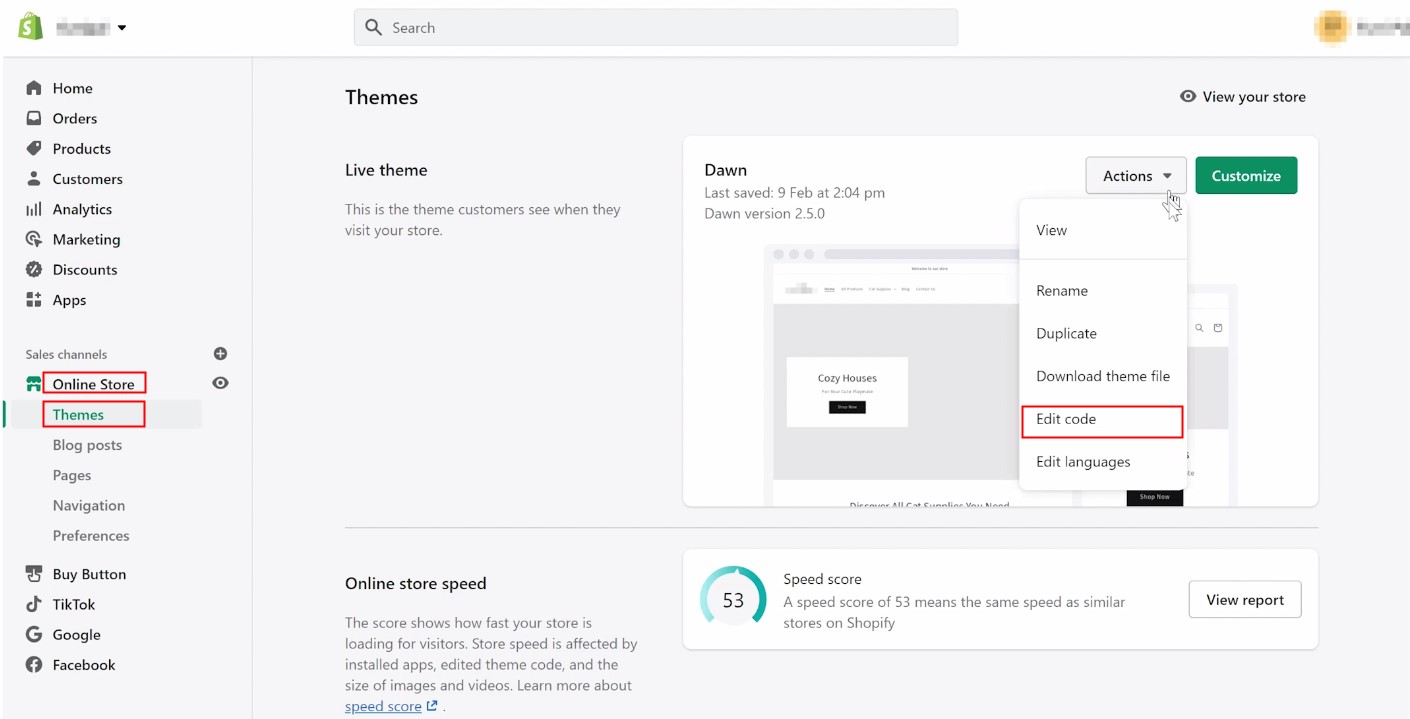
Just go to your Shopify Admin, choose "Online Store" - "Themes" - "Actions" and click "Edit code" in the drop-down menu.
Find the file of the homepage code, paste the meta tag on the top, and click "Save."
Return to Facebook to click the "Verify domain" button to complete the process. Now, you're on the page of web event configurations.
If you have multiple Facebook pixels, make sure to use the right one to track events. Click "Manage Events" to edit these events. Select the right pixel for tracking. Once a change is made, you need to define the event again.
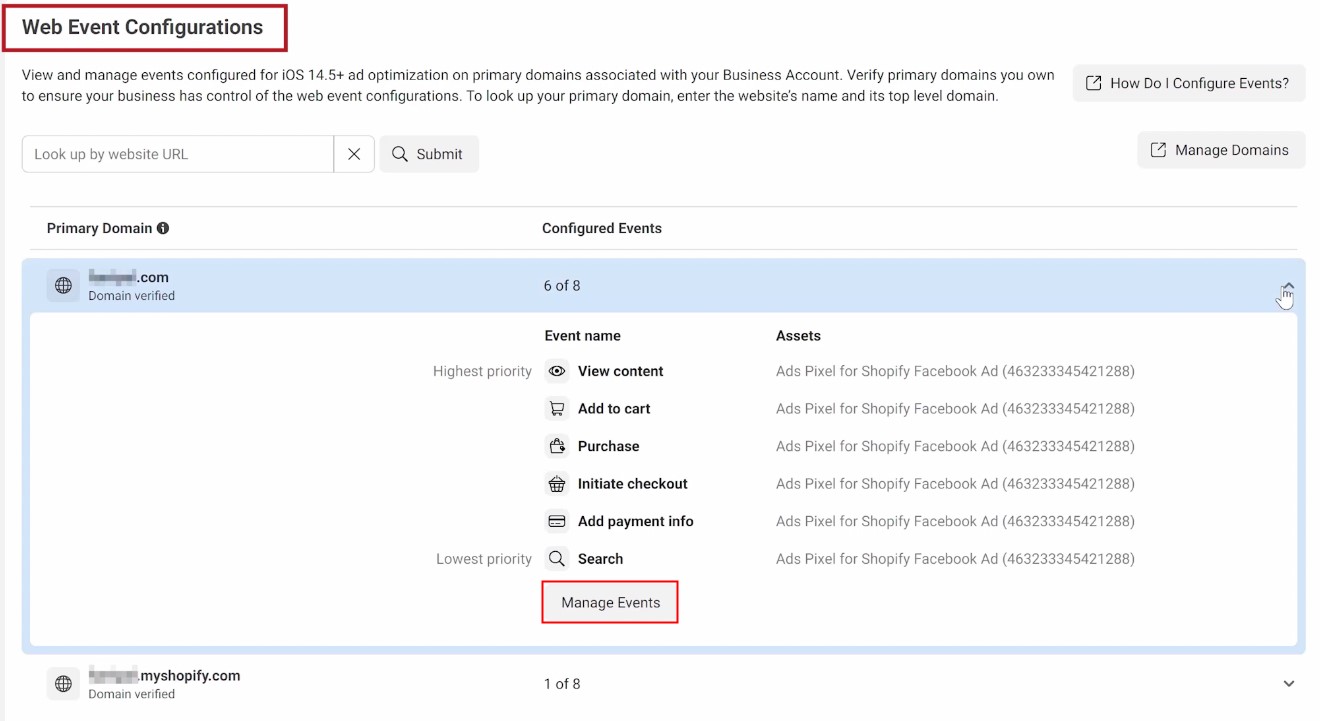
Because you have so many standard events to choose from, resetting is easy.
Finally, confirm the changes and click "Apply."
You can do so with another domain if you have any.
Return to "Events Manager," refresh the page, and you can now move on to "Test events."

Move on to "Clear activity."

Then, enter your store URL, and click "Open website."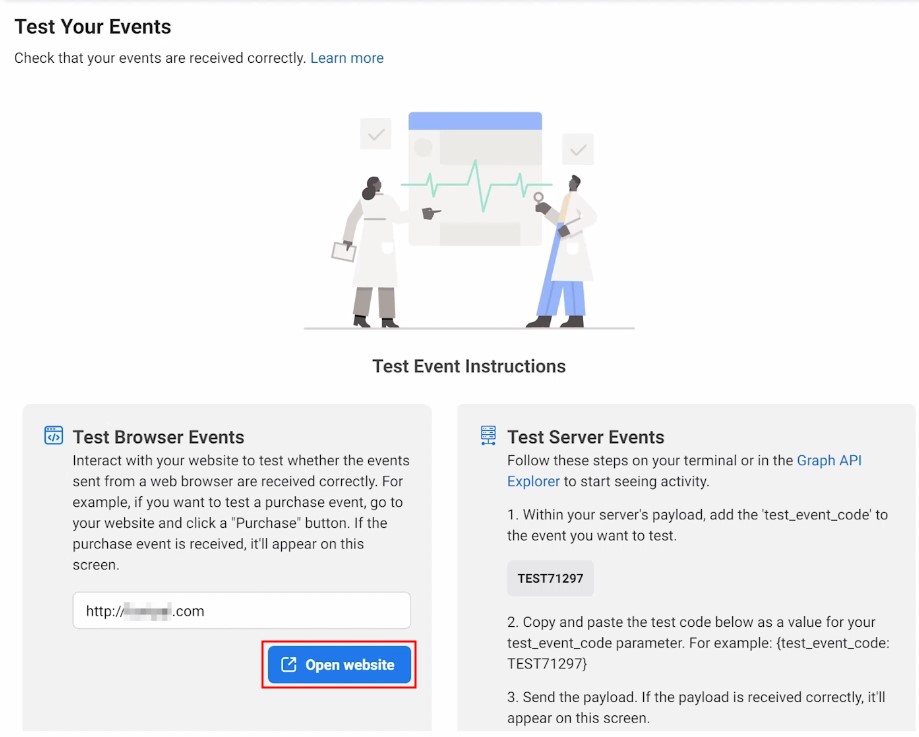
Just quickly browse your products, add one to the cart, go back and you can see all your activities tracked, including PageView, View content, and "Add to cart."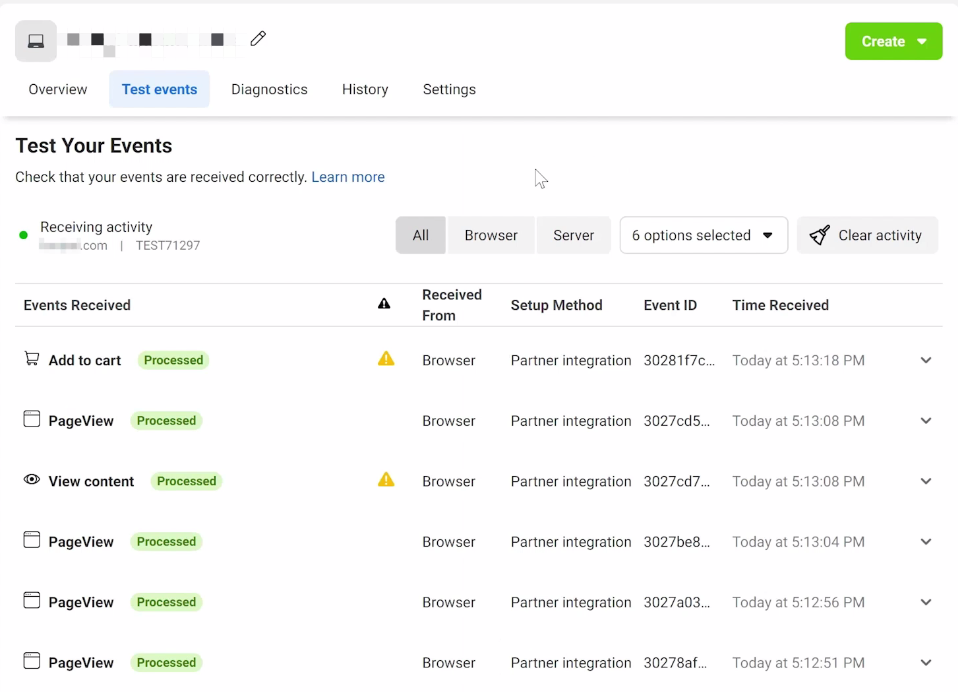
Final Words
After completing the setup above, you can go to Facebook Ads Manager to start creating ads to drive traffic to your Shopify store.

